Introduction
With the highly anticipated Arbitrum airdrop just around the corner on Thursday, March 23rd, 2023, and scheduled to go live at 12:50 P.M. UTC at the time of writing, preparation is essential to stay ahead of the curve. As observed during the Optimism airdrop, high network congestion led to default RPCs being slow or even experiencing downtime. However, those who came prepared were able to claim their tokens earlier than others and trade at favorable prices.
The following addresses are important for the Arbitrum airdrop:
- Token contract: 0x912CE59144191C1204E64559FE8253a0e49E6548
- Claim contract: 0x67a24CE4321aB3aF51c2D0a4801c3E111D88C9d9
Token Contract Approval
To save time when trading tokens on a DEX immediately after the airdrop, consider giving spending approval to the DEX of choice in advance. First, go to the token contract on Etherscan.
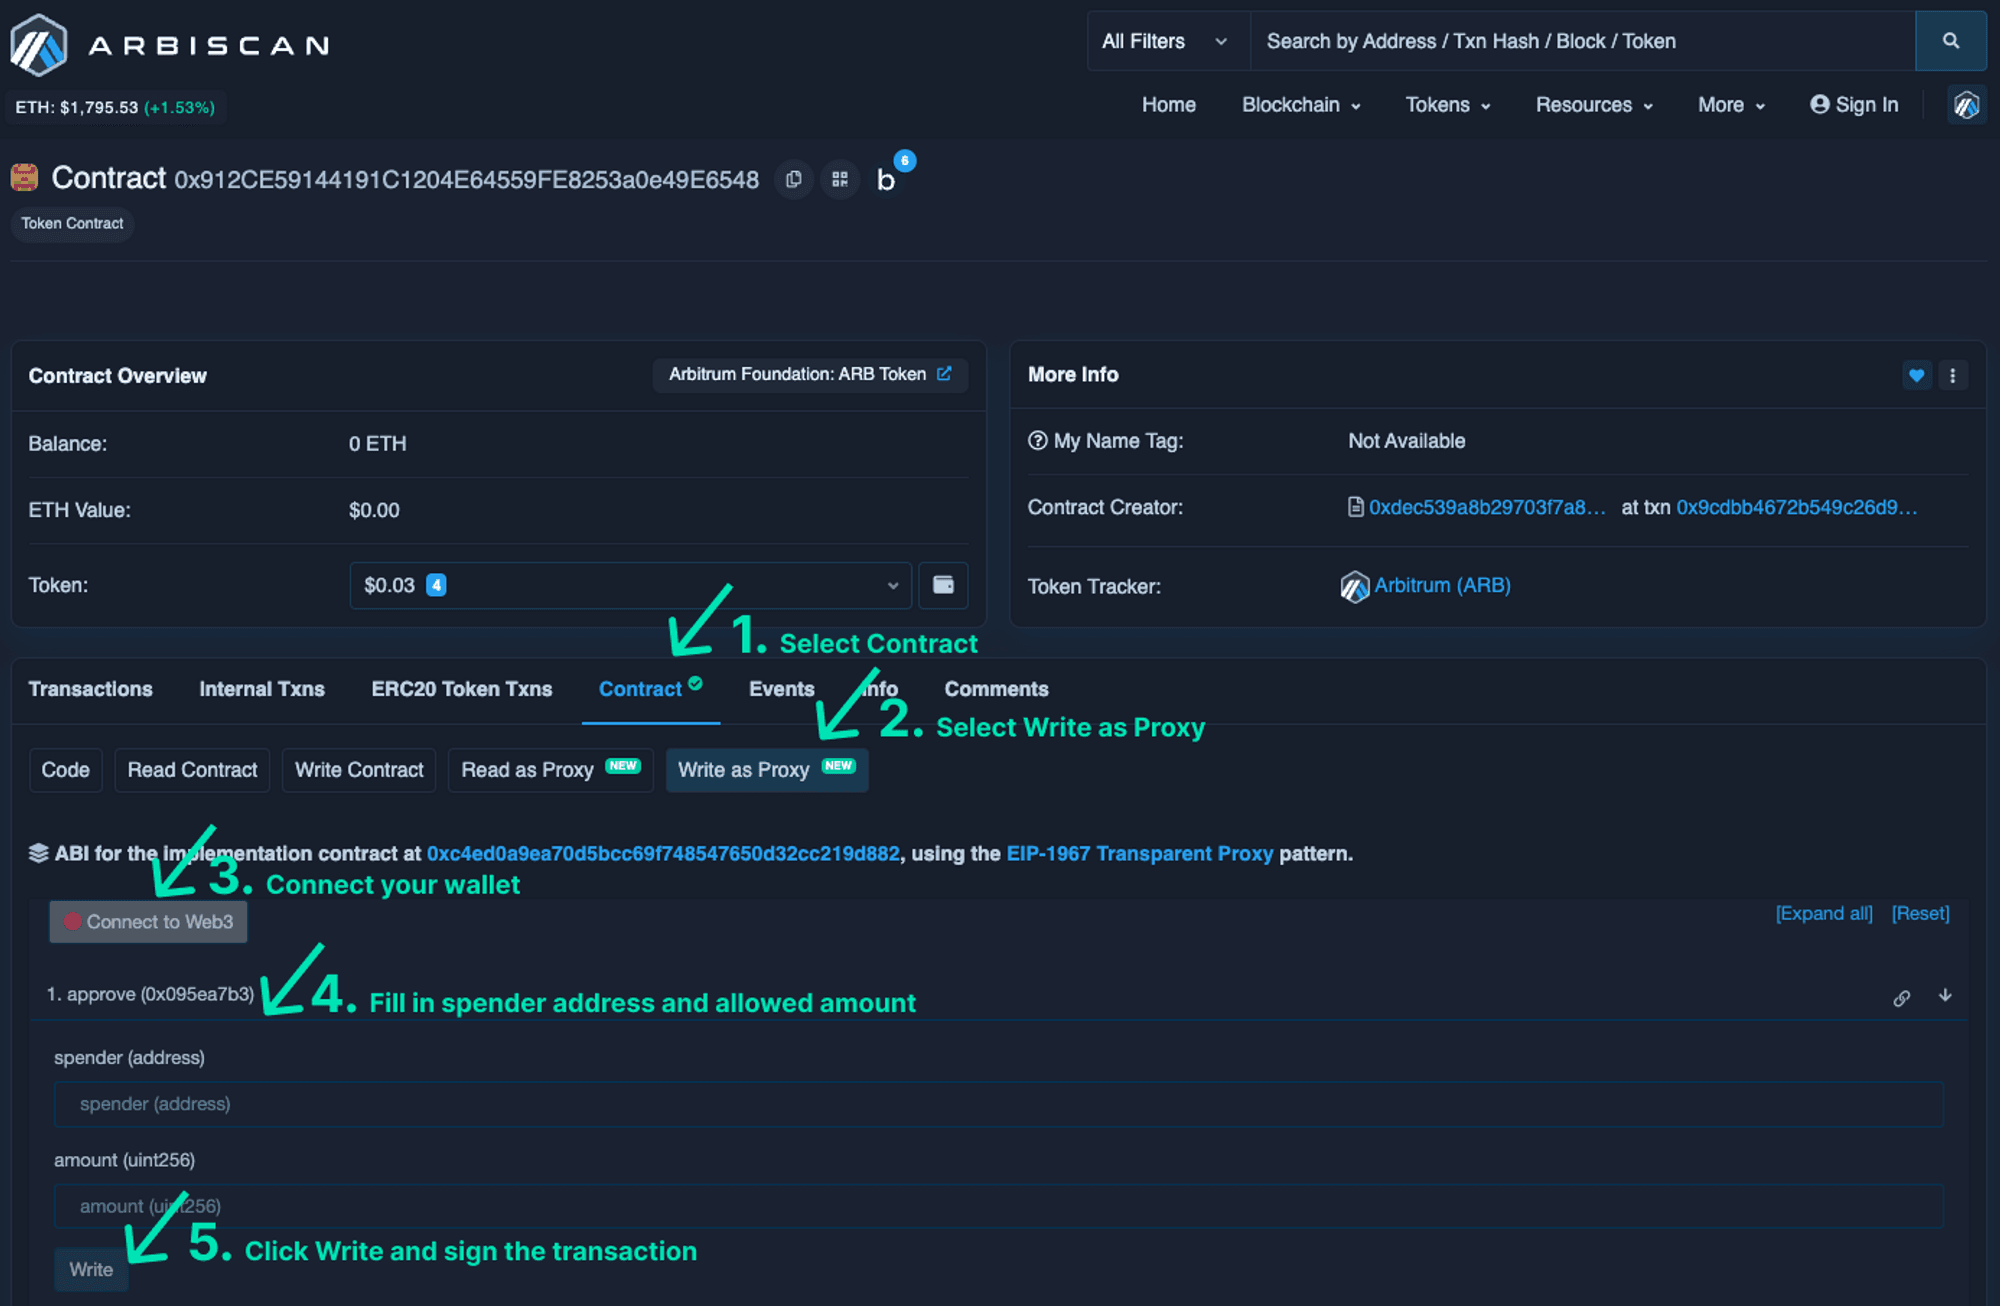
- Select the Contract tab.
- Navigate to the ‘Write as Proxy’ section of the contract.
- Click on the ‘Connect to Web3’ button to connect your wallet.
- To enable trading on Uniswap V2 & V3 for example, add the contract 0x4c60051384bd2d3c01bfc845cf5f4b44bcbe9de5 to the spender field and specify the maximum spending limit in the amount field of the 'approve (0x095ea7b3)' function. Only approve contracts that you trust.
- Click the ‘Write’ button and sign the transaction.
After the transaction is confirmed and the tokens are claimed, you will be able to trade your Arbitrum tokens on the DEX with the spending approval in place.
Expanding RPC Provider Options
Metamask uses Infura as the RPC provider by default, which may cause an overload during peak usage since most users stick to this setting. As a consequence, claimants routing transactions through Infura could experience delays or transaction failures. This was the case during the Optimism airdrop and trying out alternative RPC providers allowed some claimants to trade their airdropped tokens faster than those who stuck with the default provider. To interact with Arbitrum through Alchemy, follow the steps below.
- Start by making an Alchemy account by clicking ‘Get started for free’ on https://www.alchemy.com/ and then navigate to the dashboard section.
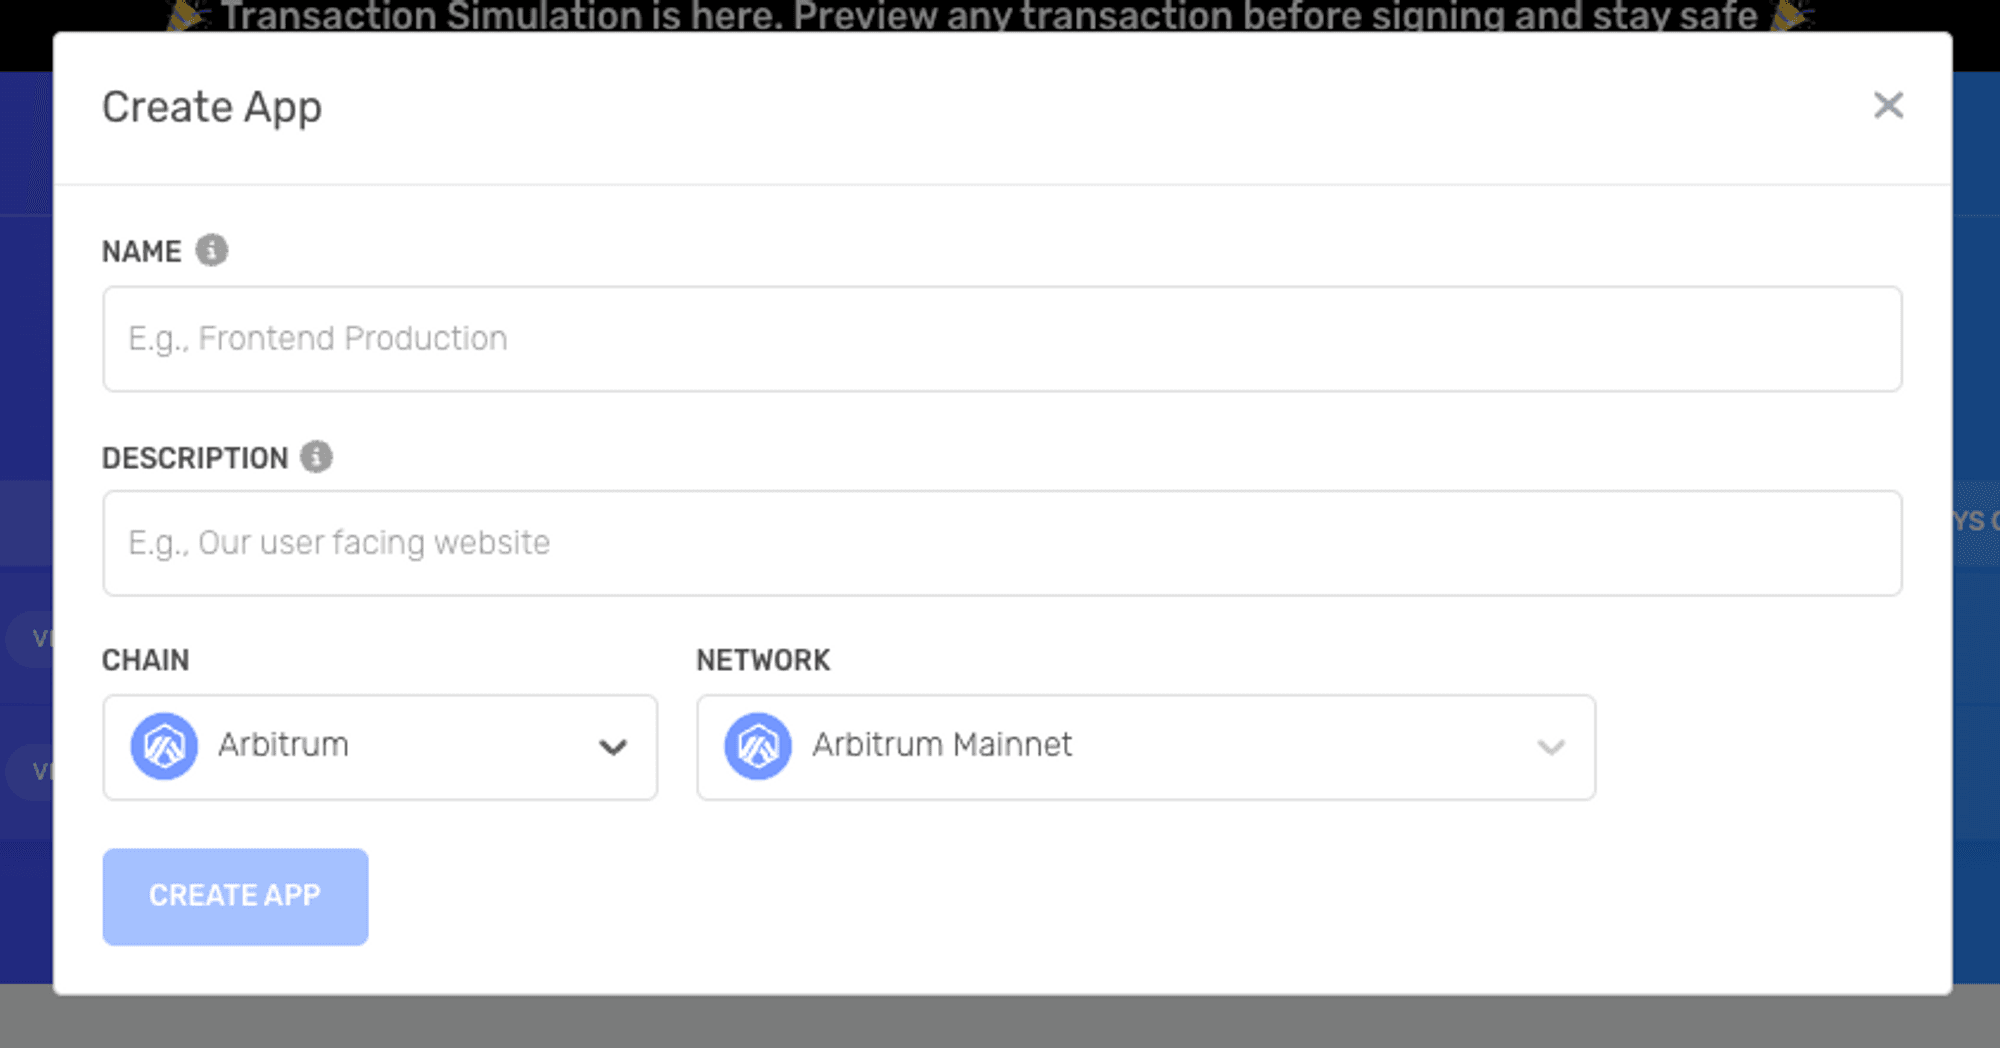
- Click on 'CREATE APP' on the dashboard, give it a name and description of your choice, select Arbitrum as the chain and hit 'Create APP'.
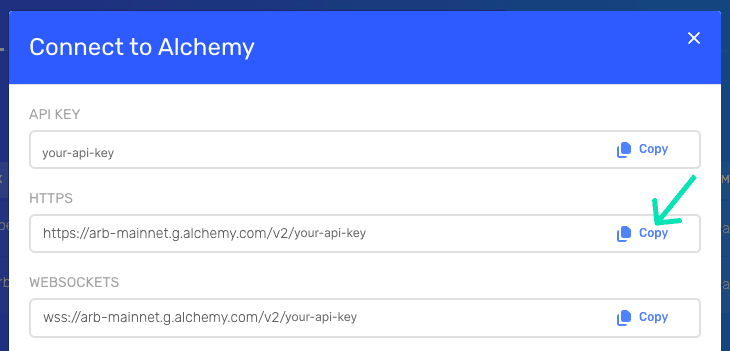
- Click on the ‘VIEW KEY’ next to the newly created APP and copy this URL: https://arb-mainnet.g.alchemy.com/v2/your-api-key
Now open MetaMask to perform the following steps.
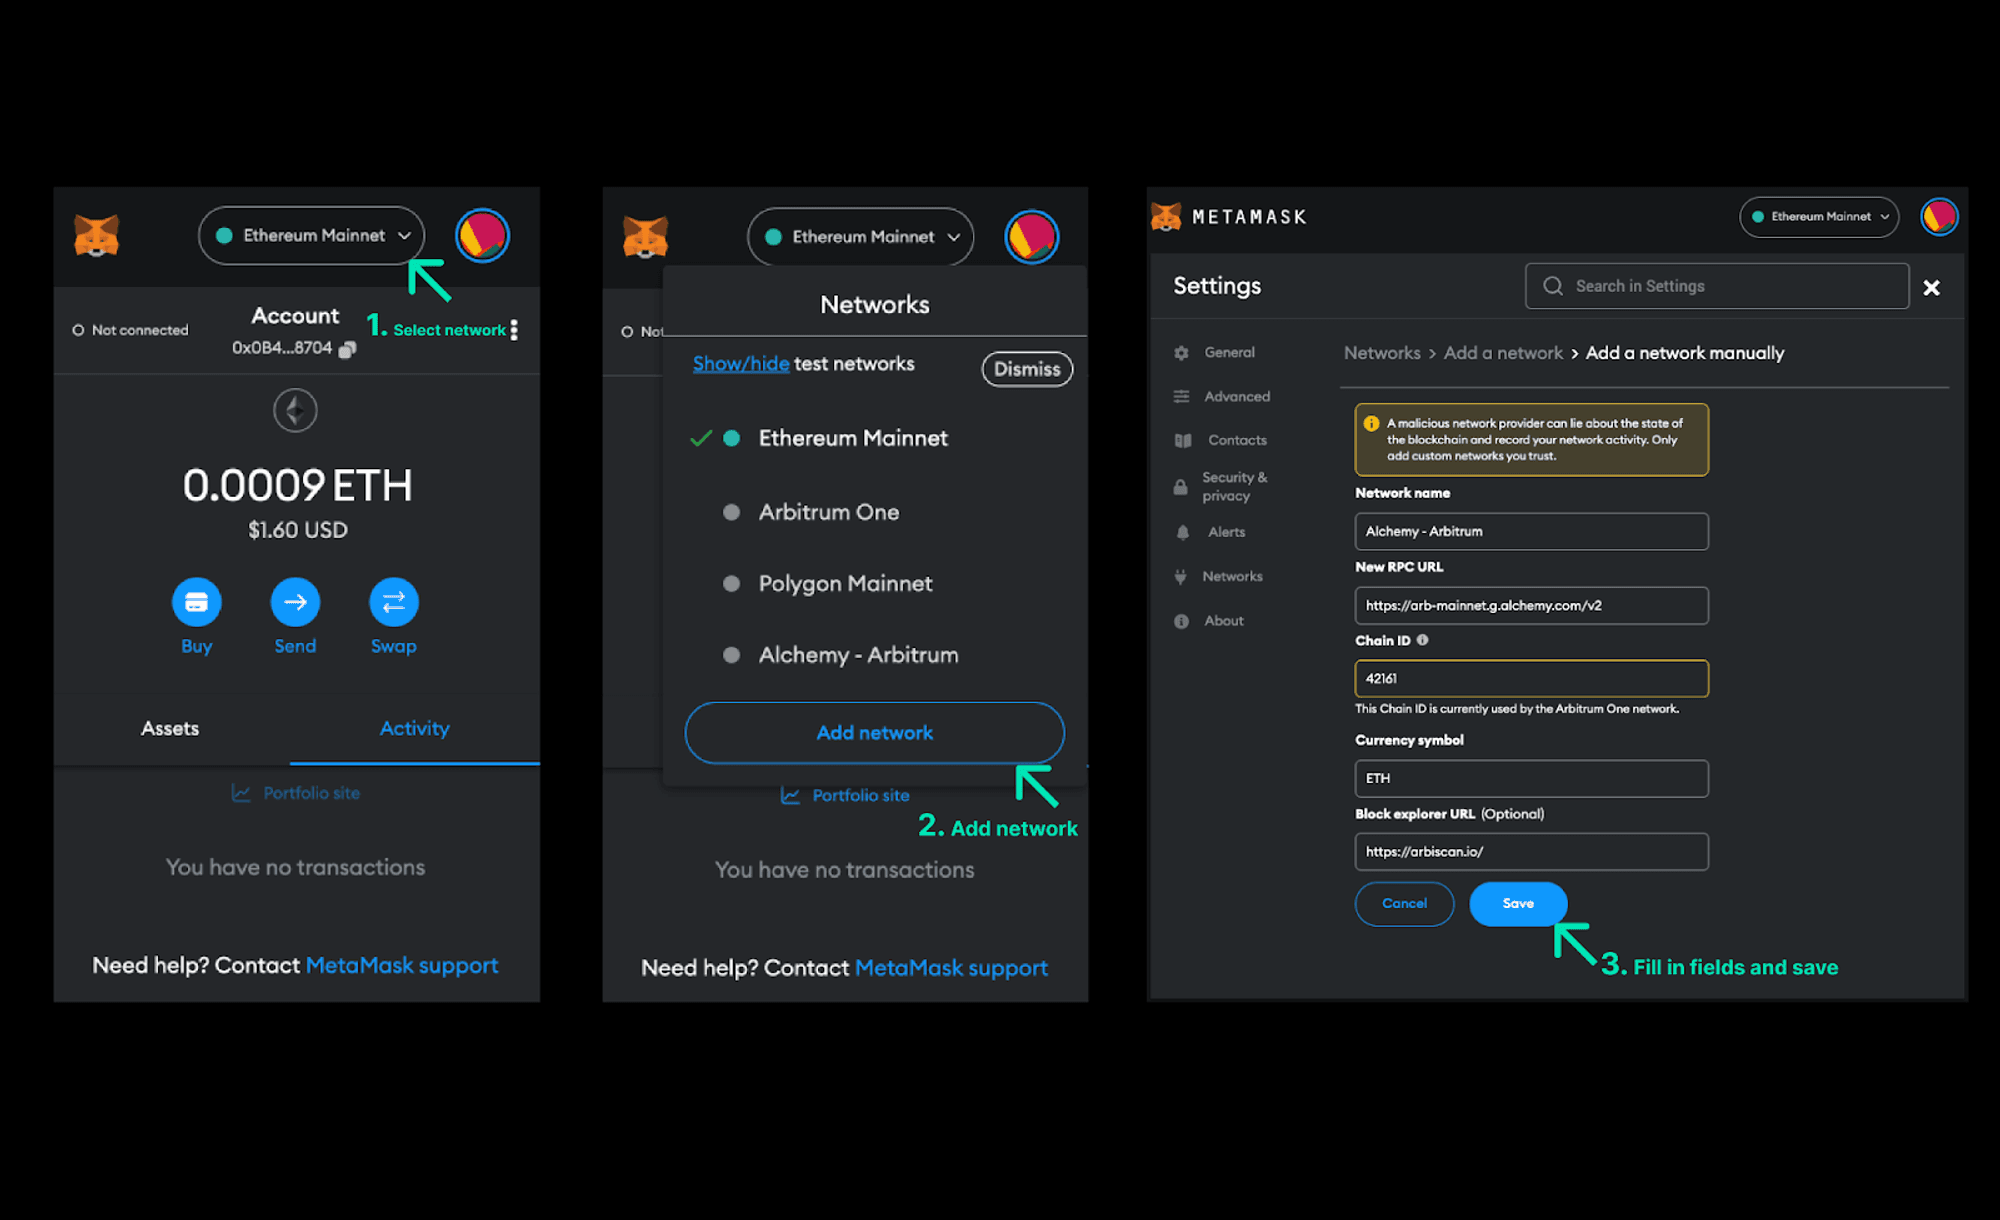
- Go to the network dropdown list.
- Select ‘Add network’ and ‘Add a network manually’.
- Fill in the following fields for the provider and click save.
- Network name: i.e. Alchemy - Arbitrum, make sure to give it another name than the default one so that it doesn’t get overwritten.
- New RPC URL: paste the copied RPC URL from the Alchemy dashboard in this field: https://arb-mainnet.g.alchemy.com/v2/your-api-key.
- Chain ID: should be set to: 42161.
- Currency symbol (optional): can be set to: ETH.
- Block explorer URL (optional): can be set to: https://arbiscan.io/.
The same reasoning applies when adding other RPC providers. Adding more providers gives you the freedom to switch between them if one fails to deliver.
Claiming the Airdrop Directly from Contract
Opting for direct claims from the contract provides a safeguard against possible front-end downtime.
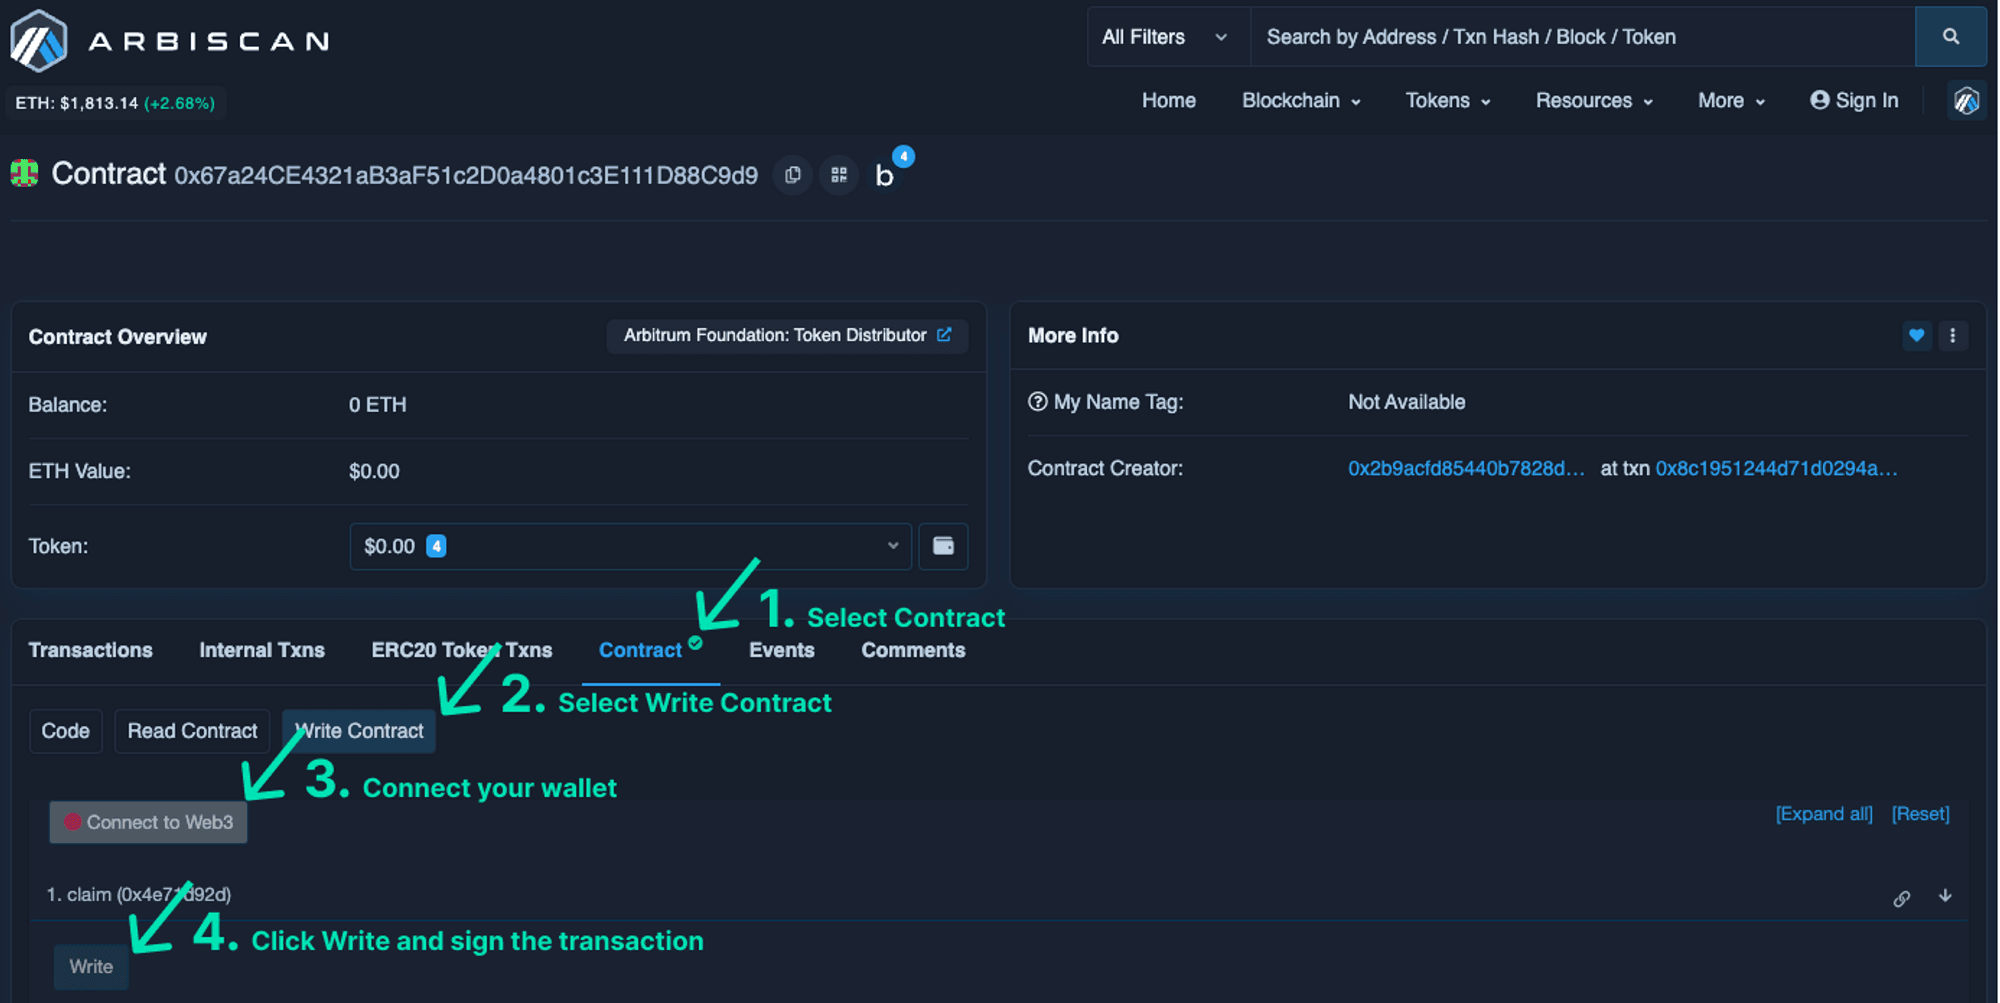
- First, select the Contract tab.
- Head over to the ‘Write’ section of the contract.
- Click on the ‘Connect to Web3’ button and connect your wallet.
- Claim your tokens by clicking the ‘Write’ button of the claim (0x4e71d92d) function and sign the transaction.
- Import the token contract into your wallet.
Once the transaction is confirmed, the airdrop should appear in your wallet.


